
Last updated August 27, 2026
Free in-home measure and quote - PGT, CGI and CWS impact lines compared on your actual openings, style by style
Sliding glass doors

Impact garage doorsPGTCGI
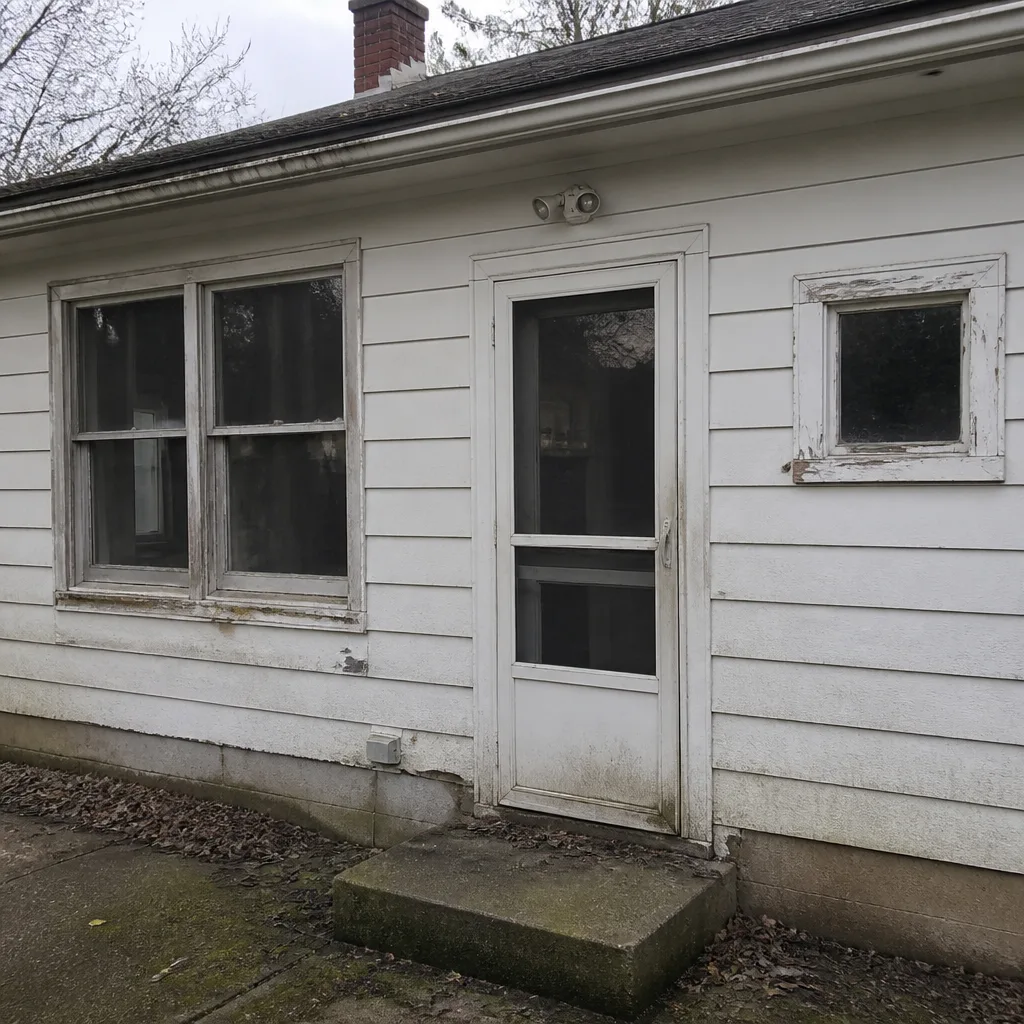 Before
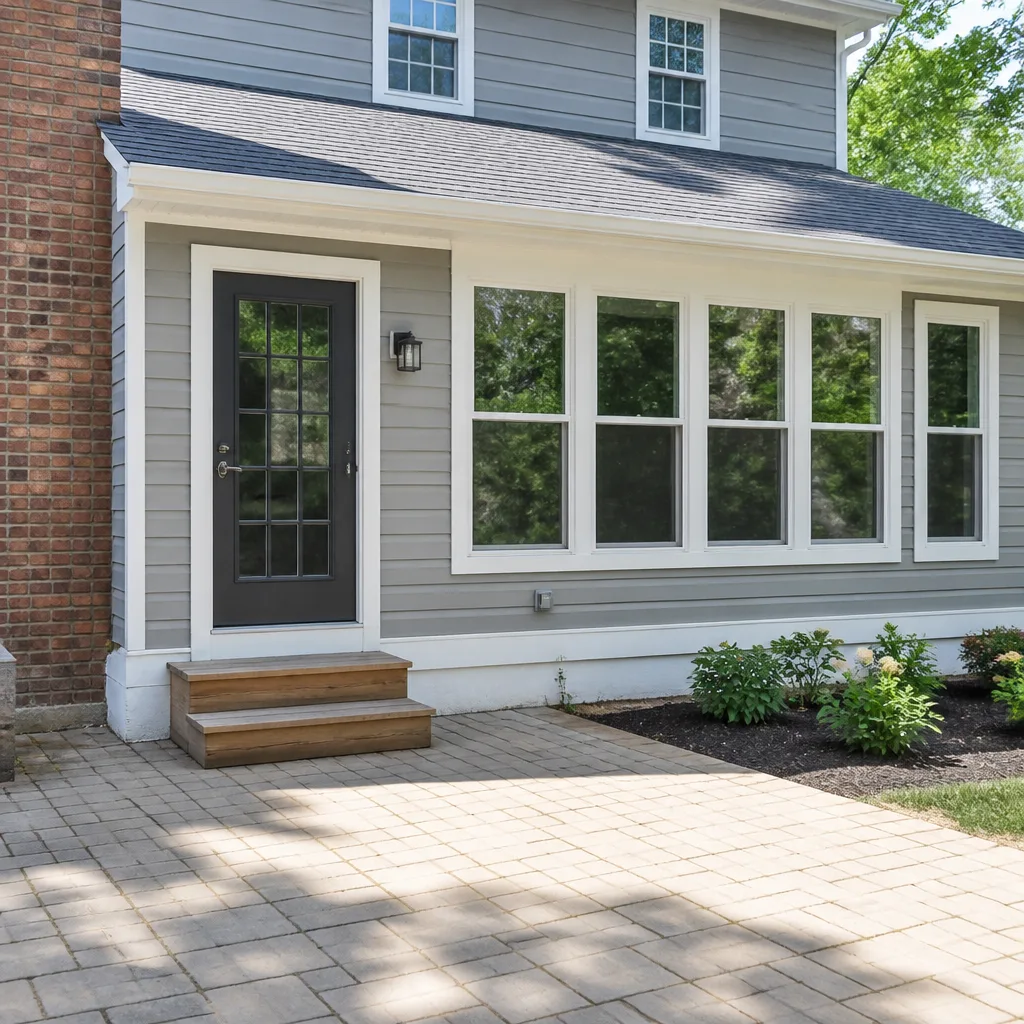 After
After Before
 After
After Before
 After
AfterWindow Installation Warning Signs Every Homeowner Should Know
A window that looks perfect in October can be revealing serious installation failure by March. The flashing sequence that matters most is buried behind stucco you cannot see. What you can see, if you know where to look, are the secondary indicators that experienced glaziers read like a diagnostic report. And most homeowners walk past them for years. In Columbus, where freeze-thaw cycles punish every gap in a window assembly, these signs are not subtle if you know the schedule they follow. This guide teaches you that schedule-our Window Replacement Maintenance Schedule: What to Do and When-covering what appears in the first wet season, what appears at the first hard freeze, and what only shows up after the warranty paperwork has been filed away somewhere safe.
Quick Answer
The most telling window installation warning signs are not visible on installation day. They appear in the 12 months that follow. Look for tooled sealant joints that crack at the corners, ghost staining behind interior trim after rain, sashes that lock in one season but bind in another, and an installer who cannot produce warranty paperwork with every duration written down. Any one of these suggests the window was set out of plumb, flashed incorrectly, or sealed with the wrong material. All of them together mean you should get a second opinion in writing before the original contractor’s warranty runs out.
Table of Contents
- The Exterior Inspection Checklist: What the Sealant Tells You
- Interior Warning Signs During the First Wet Season
- Operational Tests That Reveal Frame Racking
- The Paperwork Warning Signs a Good Installer Never Trips
- Condensation or Installation Leak: How to Tell the Difference
- The 12-Month Timeline of Failure Indicators in Columbus
- When to Call the Original Installer Versus a Second Opinion
The Exterior Inspection Checklist: What the Sealant Tells You
Walk around your house an hour after a heavy rain stops. Start on the side that gets the prevailing wind. In Columbus, that means the west and southwest exposures most of the year. What you are looking at is not the window glass. You are looking at the sealant joint where the window frame meets the cladding, stucco, or brick.
A properly installed window shows a sealant joint that is tooled. That means someone ran a finger or a tooling spoon along the bead while it was still wet, forcing the sealant into the gap and leaving a smooth, concave profile with clean edges. This is the shape that flexes with thermal movement. A smeared joint, by contrast, looks like someone wiped it with a thumb and left a ragged edge. Smeared sealant pulls away from one side of the joint within a year. That gap is where water enters.
Here is the checklist we use when we evaluate someone else’s work:
- Sealant joint profile: Tooled and concave is correct. Smeared, flat, or rope-like means the installer did not set the sealant properly and it will fail early.
- Flashing edge visibility at the head: Look at the top of the window. You should see the leading edge of a flashing tape or metal drip edge peeking out just above the frame, under the seam of the cladding. If the head of the window is sealed tight with caulk only, there is no drainage path. Water has nowhere to go but in.
- Flashing visibility at the sill: At the bottom, a sloped sill pan should be visible or, at minimum, the cladding should slope away from the frame. If the bottom sealant joint is sealed completely flat across the sill, the installer trapped water behind it instead of giving it a path out.
- Gap uniformity around the frame: Step back and sight the gap between the frame and the cladding on all four sides. A gap that is 3/8 inch on one side and 1/8 inch on the other means the rough opening was too big, too small, or the window was not centered before it was fastened.
What these variations indicate is not random. A smeared sealant joint and a sealed-tight sill almost always appear together. They are the signature of a crew that treats sealant as decoration rather than as part of the drainage system. And in Columbus, where spring rains arrive fast and clay soil holds water against foundation walls, that error shows up in the first March after installation.
Interior Warning Signs During the First Wet Season
The first wet season after a window installation is your best diagnostic window. Here is why: any flaw in the flashing sequence will show up as water on the inside within six months of the first sustained rain. After that, the water paths become established and the signs migrate. The water soaks into the framing, the drywall wicks it upward, and the stain you eventually see is three feet away from the actual leak.
Here is where to look, in order of what appears first:
- Ghost staining behind the trim at the lower corners. This shows as a faint tan or gray shadow on the drywall just below the window stool, behind the casing. It means water is entering at the head or side of the frame and running down inside the wall to pool at the sill. The stain is not from a leak at the bottom. The bottom is just where the water stops.
- Paint bubbles on the window stool or the drywall immediately below the stool. Small, hard bubbles with a defined edge indicate moisture from behind. Larger, softer blisters with a chalky residue indicate wet drywall. Both mean water is present inside the wall cavity. Do not wait for the paint to peel.
- Staining at the upper corners of the casing. This is rarer but more serious. It means water is entering at the head flashing and running down the inside face of the rough opening. By the time this stain appears, the king stud and header are already holding moisture.
- A persistent damp smell in one room without a visible source. In Columbus humidity, this smell rarely appears in winter. It appears in spring and early summer when the wall cavity warms up and releases what it absorbed during the wet season.
One distinction matters here, and it is the one most homeowners miss: installation-source water and condensation-source water look different. Condensation forms on the room side of the glass, puddles on the stool, and evaporates when the bathroom fan runs. Installation water appears behind the trim, under the paint, or on the wall below the window, and it does not dry out with ventilation. If you have wiped the glass dry and the moisture returns behind the casing, you are looking at an installation defect, not a humidity problem.
Operational Tests That Reveal Frame Racking
A window sash is a precision square. The frame it sits in has to be plumb, level, and square within a tight tolerance. When an installer sets a window into a twisted or out-of-level rough opening without shimming it true, the frame racks. It does not matter if the window is a Marvin or a Milgard: a racked frame ruins the operation of any sash on the market, and the manufacturer warranty will not cover it because the failure is in the installation, not the product.
The homeowner test for frame racking is seasonal, not daily. Here is the sequence that reveals it:
- A sash that locks in summer but not in winter. Aluminum expands in heat and contracts in cold. A racked frame that is tight in July is binding in January. If you have to shoulder the sash to get the lock to engage in cold weather, the frame was not set true.
- Hardware that requires force to engage in one season and works freely in another. This is the same mechanism at work on the crank-outs and tilt-and-turn hardware. A Jeld-Wen casement that cranks fine in fall and binds in spring is telling you the frame moved.
- Gaps that appear seasonally. Look at the gap between the sash and the frame at all four corners in January, then again in July. A gap that opens and closes with the weather means the frame is flexing because it was not anchored rigidly enough. This is most common in wood-frame construction in older Columbus neighborhoods like Clintonville and German Village, where rough openings move with the seasons.
- A sash that drops when you open it halfway and let go. This is a balance issue, but the cause is often a racked frame that is putting uneven pressure on the pivot pins. The balance is fine. The frame is the problem.
Here is the important point: none of these conditions fail on the day of installation. The installer can demonstrate a perfectly operating window at handover. The failure appears at the first hard freeze or the first sustained heat. That is why window installation in Parkway and the surrounding Columbus neighborhoods should be evaluated through a full heating and cooling cycle, not just at completion.
The Paperwork Warning Signs a Good Installer Never Trips
Paperwork is where the quality of an installation becomes provable. A window can look straight and operate smoothly, but if the warranty documentation is missing, blank, or unsigned, you do not have a warranty. You have a conversation.
An experienced window replacement contractor in Parkway registers both layers of the manufacturer warranty before the job is closed out. That means the product warranty and the glass warranty are on file with the manufacturer, with durations stated in writing, and the homeowner has a copy. Most installers register the product warranty and skip the glass warranty because it takes a second phone call. That second call is the one that covers a failed seal ten years later.
Here is what we look for when a homeowner asks us to inspect a recent install, paperwork included:
- The installer cannot produce registered warranty documentation. A purchase order is not a warranty. A receipt is not a warranty. The registered document comes from the manufacturer and lists the homeowner’s name, the window model, the date of installation, and the warranty period.
- Durations left blank on the warranty certificate. This happens more than you would expect. A warranty form with an empty line for the glass warranty term is not covered until that line is filled in and registered.
- No warranty language on the job completion document at all. The completion slip should state the workmanship warranty period in plain numbers. Not a verbal promise. Not a handshake. A number, written down.
- The workmanship warranty is less than one year. A 30-day workmanship warranty is a red flag for an installation crew that expects callbacks. A company that does the work right the first time backs it for longer than the minimum.
- Months 1 to 3, the first heavy rain: Sealant failures at corners or at the seam between the window and the siding show up as wet drywall below the window. The leak path is short, so the sign appears fast.
- Months 3 to 6, repeated wet-dry cycles: The first ghost staining appears behind the casing at the sill. The water has found a path through the flashing and is pooling at the bottom of the rough opening. The stain is faint because the wood is still drying out between rains.
- Month 6 to 9, first sustained heat: The frame moves. A window that was not shimmed true will show its first seasonal bind or seasonal gap. Sashes that opened fine in spring now require a firm push. Also, the first paint blisters appear as trapped water expands in the heat.
- Months 9 to 12, first hard freeze: Any water that found its way behind the sealant now freezes and expands. The ice pressure opens small gaps into larger ones. By spring of year two, the leak that started as a thimbleful per storm is a visible stain and a swollen piece of trim.
TruePane’s The Keystone Standard exists because Dale Kessler spent years fixing out-of-true installs and voided warranties that no one else would own. Both warranty layers are registered in writing, durations stated, before the truck leaves the driveway. Not because the manufacturer requires it. Because a homeowner who knows what the paperwork should look like will not settle for less.
Condensation or Installation Leak: How to Tell the Difference
This is the question we get more than any other in Columbus, and it is the one where a wrong diagnosis costs either money or health. The difference is specific and observable.
Condensation forms on the room-side surface of the glass and on the metal spacers between the panes. It appears on cold days, typically in the morning, and it clears when the room heats up or the humidity drops. It is a humidity problem, not an installation problem. In older Columbus homes with radiators, heavy cooking, and no exhaust fan in the bathroom, condensation is routine in January.
An installation leak shows up as water that appears behind the trim, under the paint, on the drywall below the stool, or as a persistent stain at the baseboard in the wall below the window. It does not respond to ventilation changes. It appears after rain, not after showers. And it recurs on the same schedule regardless of indoor humidity.
The third category is condensation between the panes. This is a failed seal, not an installation leak. It looks like fog or smears between the glass that you cannot wipe away from either side. A failed seal in year one or year two usually means the glass unit was defective or damaged during installation, most commonly from a frame that was racked and twisted the insulated glass unit. A failed seal in year twelve is an aged unit doing what aged units do. The glass warranty, if it was registered properly, covers the distinction.
The 12-Month Timeline of Failure Indicators in Columbus
Installation failures in Columbus do not appear randomly. They appear on a schedule, and that schedule follows the weather. Here is the sequence we have documented in homes across the city, from Worthington to Pickerington:
That schedule is the reason a homeowner should keep an eye on the windows through the full first year, not just the first month. A window that looks done right at handover can still reveal a flashing sequence failure at the first sustained rain, a racking failure at the first heat wave, or a sealant failure at the first freeze. The signs are visible. Most people just are not looking on the right schedule.
When to Call the Original Installer Versus a Second Opinion
The original installer gets the first call if the problem is a defined defect: a sash that will not lock, a seal that fogged, a piece of hardware that failed. These are product issues, and a legitimate contractor will return to address them promptly.
But if you are seeing the signs in this guide: ghost staining behind trim, seasonal racking, a smeared sealant joint that has started to crack: the original installer is the wrong call. Here is why. The crew that set the window out of true is not going to diagnose itself as the problem. They will tell you the window is fine and the staining is from condensation. They will tell you the frame moved because the house shifted. They will tell you the warranty does not cover it.
The only leverage a homeowner has is a second opinion in writing, delivered before the original contractor’s warranty period expires. A written second opinion from a company that has documented the specific failure, with photos and measurements, is what you need to file a claim against the workmanship warranty or, in the worst case, to document the defect for a legal claim.
Do not wait until one month before the warranty expires. Get the second opinion in months 6 to 10 of the first year, while the original installer is still on the hook and while the signs are at their clearest. We do these inspections regularly for Columbus homeowners who suspect a recent install was not done correctly. We document what we find, in writing, with photos and measurements, and we do not soften the report. The homeowner paid for the truth, not for a comfortable conversation.
Common Mistakes to Avoid
- Wiping up the stain and waiting to see if it returns. A water stain behind the trim never goes away on its own. It is a symptom of a leak path that has already established itself. Waiting only lets the framing hold moisture longer.
- Sealing the exterior gap with caulk as a fix. This is the most common DIY response to a suspected leak, and it often makes the problem worse by trapping water that previously had a drainage path. Sealant is a gasket, not a fix for missing flashing.
- Assuming a fogged pane is cosmetic. A failed seal is a moisture failure inside the insulated glass unit. It reduces the window’s energy performance and will grow visible smears. It is covered under the glass warranty if that document was registered.
- Signing the completion slip before checking the warranty paperwork. The completion document is the last piece of leverage you have at handover. If the warranty durations are not written down, do not sign until they are.
- Replacing the window with a new unit without investigating the cause of failure. A racked frame will ruin the replacement too. The cause has to be fixed first, which usually means re-setting the frame plumb and square, not just swapping the sash.
- Ignoring seasonal tightness as “the house settling.” Houses do settle, but a window that locks in one season and binds in another is racked, not settling. Settling does not reverse itself in May.
- Hiring the low bid for a second time on the same window. The cheapest bid was likely the reason the first installation failed. A proper installation with a true frame and registered warranties costs what it costs.
When to Call a Professional
Call a professional when the window shows any of the seasonal signs in this guide: staining behind trim after rain, a sash that locks in one season and binds in another, cracked sealant at the corners, or paperwork that does not hold up. Call when the warranty on the original job is still active and you want a written second opinion, because that is the window of leverage. Call when a fogged pane appears in a young window, because the manufacturer’s clock is running. TruePane Windows & Doors offers free estimates in Columbus. We are a local, second-generation glazier’s company, our home office is right here in the community, and a live person answers the phone 24 hours a day. Call (888) 635-0804 and we will walk the property, check the frames, and tell you in plain language what is wrong and what it takes to fix it.
For door installation in Parkway, the same inspection standards apply. A door that binds at the latch in summer but not winter is telling you the same story as a racked window frame. We evaluate them the same way, with the same checklist, and the same written report.
Frequently Asked Questions
The most common signs are sealant joints that crack at the corners within a year, ghost staining behind interior trim after rain, a sash that locks in one season but binds in another, and a gap around the frame that is not uniform. In Columbus, these signs usually appear first on the west and southwest exposures because those sides take the prevailing rain and wind. Call (888) 635-0804 for an inspection if you are seeing any of them.
Condensation forms on the room-side surface of the glass and clears when the room heats up or humidity drops. A window leak shows up as water behind the trim, under the paint, or on the drywall below the stool, and it appears after rain rather than after showers. If the moisture is behind the casing and does not respond to ventilation, that is a leak, not condensation.
Yes, in most cases. If the frame is racked, it can be re-set plumb and square by removing the interior trim, cutting the fasteners, shimming the frame true, and re-fastening it. If the leak is from a flashing sequence error, the exterior cladding often has to be cut back at the problem joint to correct it. The window unit itself is usually fine. The installation is what failed.
Workmanship warranties in Ohio range from 90 days on a low-cost install to 10 years from a company that stands behind its work. The manufacturer’s product and glass warranties are separate and typically run 10 to 20 years if both layers are registered in writing. TruePane’s workmanship is covered by the Done Right Promise, and both manufacturer warranty layers are registered before the truck leaves the driveway.
Document the leak with dated photos and written notes, then get a second opinion in writing from a licensed contractor before the original workmanship warranty expires. The written second opinion is the document that supports a warranty claim or a legal claim if it comes to that. Do not sign anything with the original installer until you have that report.
Yes. We inspect windows installed by other companies all over the Columbus area. We document what we find in writing, with photos and measurements, and we give you a plain-language report on whether the installation is sound or whether it needs correction. You do not have to have bought the window from us to get the inspection. Call (888) 635-0804 to set one up.
The Bottom Line
The most costly window installation failures are the ones you cannot see on the day of completion. A racked frame reveals itself at the first hard freeze. A flashing sequence error appears at the first sustained rain. A sealant failure shows up at the corners within a year. What separates a homeowner who catches these early from one who lives with a staining window for a decade is not a tool set. It is a schedule and a checklist, which you can supplement with more guides & resources on our blog. Check the exterior sealant in the first spring. Check the interior trim in the first wet season. Check the operation at the first freeze. And check the warranty paperwork before the truck leaves the driveway. If any of it does not add up, get a second opinion in writing. The window is not the problem in most of these cases. The installation is.
Written by Dale Kessler, Owner at TruePane Windows & Doors, serving Columbus since 2008.