
Last updated August 27, 2026
Free in-home measure and quote - PGT, CGI and CWS impact lines compared on your actual openings, style by style
Sliding glass doors
Impact garage doorsPGTCGI
 Before
 After
After Before
 After
After Before
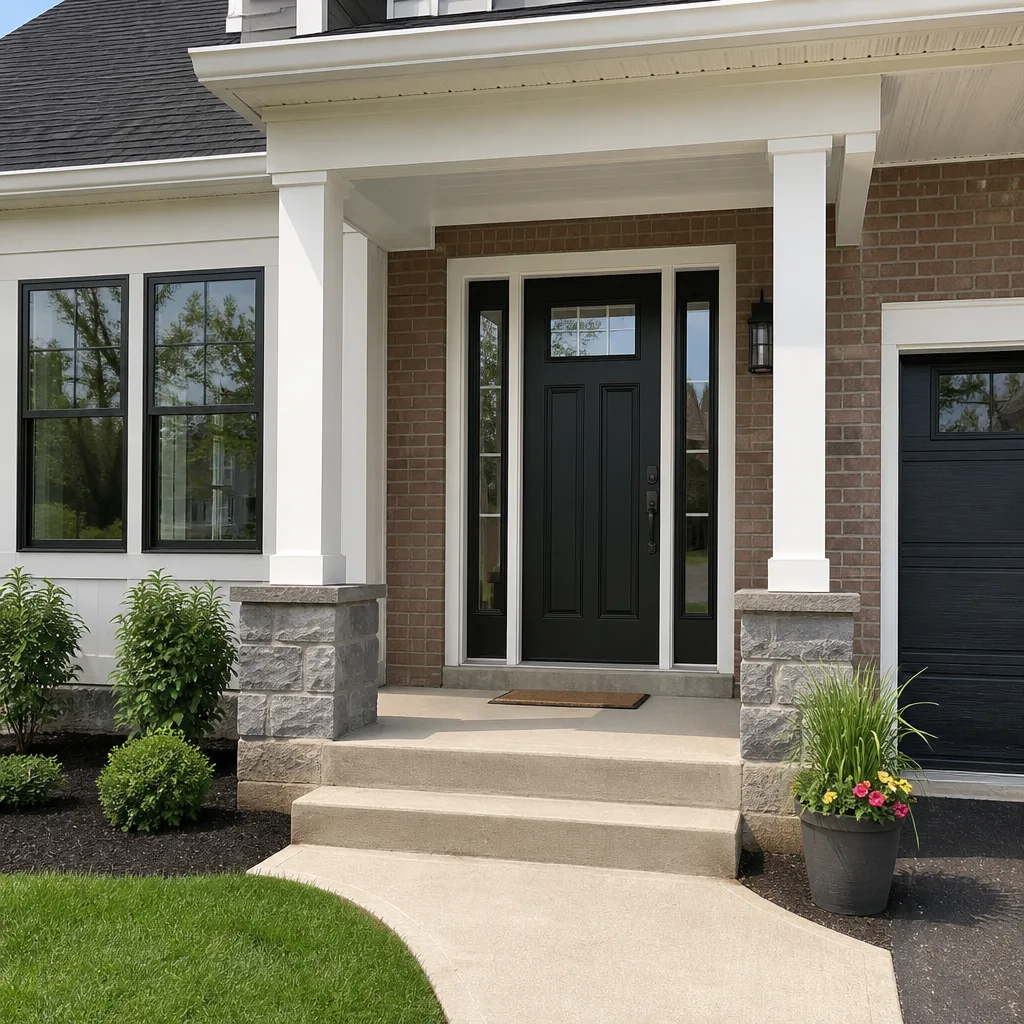 After
AfterThe Complete Door Installation Guide for Columbus Homeowners
A window is set into a rough opening that carries no structural load. A door opening, depending on its location, may be carrying the weight of the floor system above it. That distinction changes every decision in the installation process, from header sizing to shimming sequence to how much the frame can be forced into alignment before the unit binds under the first heavy load. Most Columbus door installation guides skim past this because it’s easier to talk about curb appeal than deflection. This guide takes the opposite approach. We’ll walk through what actually determines whether a door operates cleanly for twenty years or starts binding in July, with specific attention to slab foundations, stucco exteriors, and the warranty paperwork that most Columbus homeowners never see until it’s too late.
Quick Answer
Door installation in Columbus homes comes down to three variables: a structurally adequate header over the opening, a hinge-side jamb set plumb, and a threshold sealed correctly against a concrete slab or wood subfloor. Get those three right and a quality prehung door will operate cleanly for decades. Get any one of them wrong and no amount of adjustment at the hardware will fix the problem permanently. Our Door Installation services cover the full guide below: how to evaluate each variable before you order a unit, what to watch during installation, and what both warranty layers on a prehung door actually cover.
Table of Contents
- Evaluating the Rough Opening: Header Adequacy Before You Order
- Threshold-to-Slab Sealing for Columbus Slab Foundations
- Why Hinge-Side Plumb Controls Everything
- Stucco Flashing at Door Frames: The Three-Year Water Test
- Understanding Both Warranty Layers on a Prehung Door
- Choosing the Right Door Unit for a Columbus Climate
- The Installation Sequence That Prevents Callbacks
- Common Mistakes to Avoid
- When to Call a Professional
- Frequently Asked Questions
Evaluating the Rough Opening: Header Adequacy Before You Order
Before you order a door, you need to know what’s above the opening. A door on an exterior wall of a Columbus home is typically carrying load from the floor system or roof above, and that load transfers through a header sized to span the opening width. If the header is undersized, undersupported, or missing entirely, the opening deflects over time. The door frame then follows the deflection, and the slab starts dragging on the threshold or binding at the latch.
We’ve opened walls in Columbus homes where the original door header was a pair of 2x4s laid flat. That’s fine for a narrow interior partition. It’s not fine for a 36-inch exterior door carrying a second floor or a snow-load roof. The door will operate acceptably for a season or two, then the top jamb starts rubbing the slab, then the latch alignment drifts. Every adjustment a homeowner makes at that point treats the symptom, not the structure.
Here’s what to check before ordering a unit:
- Measure the opening width between the king studs, not between the existing jamb. A proper rough opening for a 36-inch door is roughly 38-1/2 inches wide. If it’s wider than that and the gap was packed with shims, someone was compensating for an irregular opening, not solving a structural issue.
- Look for signs of deflection above the opening. Cracks in drywall radiating from the upper corners of the door frame indicate movement. So does a gap between the top of the interior casing and the wall surface.
- Check the header bearing. In a load-bearing wall, each end of the header needs at least 1-1/2 inches of solid bearing on the trimmer studs. If the trimmer studs are split, notched, or missing, the header is only partially supported.
- Look for a sag in the floor above. If the second-floor floor line dips noticeably over the door, the header has already deflected. A new door will not fix this; the structure must be addressed first.
This is the step most Columbus door installation guides skip because it’s not visible in a finished wall. But it’s the difference between a door that operates for thirty years and one that needs annual adjustment. In our experience replacing doors in Columbus-area homes, we’ve found that a meaningful share of “warped doors” were never warped at all. The opening was moving around them.
Threshold-to-Slab Sealing for Columbus Slab Foundations
Parkway-area homes sit predominantly on concrete slab foundations, and that changes the threshold sealing sequence compared to a house with a wood-framed floor. Most manufacturer installation instructions assume a wood subfloor and show a threshold set onto a rough opening sill that is also wood. On a slab, the threshold sits directly on concrete, and concrete is a moisture sponge. It wicks groundwater and condensation year-round, and that moisture finds its way under the threshold if the seal is not right.
The sequence matters. Here’s the order we follow on slab installations in Columbus:
- Clean the slab surface under the threshold. Remove all debris, old caulk, and any moisture-evident sealant. A wire brush works; so does a scraper. The concrete surface needs to be dry and free of loose material.
- Run a continuous bead of polyurethane sealant along the full length of the slab where the threshold will sit. Polyurethane, not latex caulk. Latex dries out, cracks, and releases within a few seasons. Polyurethane remains flexible and adheres to both concrete and aluminum or composite threshold material.
- Set the threshold into the bead, then run a second bead along the interior and exterior edges where the threshold meets the slab. The two-bead method creates a dam that prevents water from wicking underneath.
- Check the threshold for level before securing it. On slab foundations, the concrete is rarely flat across the full width of the opening. Use stainless steel shims if needed, not wood shims, which will absorb moisture and swell.
- Run a final bead along the exterior threshold edge after the door is hung and operating. This is the last line of defense against wind-driven rain hitting the slab surface and running under the door.
Skipping this sequence is the most common cause of soft floorboards and threshold rot we find in Columbus homes with slab foundations. The water doesn’t arrive dramatically. It accumulates slowly, season after season, following the path of least resistance under the threshold. By the time a homeowner notices staining or a loose threshold, the repair is no longer a sealing job; it’s a frame repair.
Why Hinge-Side Plumb Controls Everything
Every swinging door is a lever mounted on three points: the hinge plates. If the hinge-side jamb is plumb, the door swings in a stable arc and the latch engages evenly. If the hinge-side jamb is out of plumb, even by a quarter inch across the door height, the slab’s center of gravity shifts as it swings. The door drifts or slams, the latch misaligns, and the bottom corner of the slab begins dragging on the threshold. Homeowners then adjust the strike plate, then the hinges, then the sweep, and none of it fixes the root issue.
Here’s how to check hinge-side plumb independently of the rough opening:
- Place a 4-foot level against the hinge-side jamb after the door is set but before the trim is installed. Check both faces: the face the hinges sit on and the face facing into the rough opening.
- If the jamb is out of plumb, find out why. Is the rough opening itself out of plumb? Is a shim too thick at one point? Is the jamb bowed? Each has a different fix.
- Correct the jamb, not the rough opening. You cannot plane or shim the rough opening into plumb after the fact. The jamb must be brought into plumb using shims placed behind the hinge plates, because those are the load points.
- Re-check after driving the hinge screws. Installing the slab adds weight, and weight can move a jamb that was plumb before the slab went on. Re-check hinge-side plumb after the slab is hung, before you install the casing.
We check hinge-side plumb twice on every installation: once after setting the frame, once after hanging the slab. The second check catches movement that the first miss doesn’t. It’s a small step that takes thirty seconds and prevents most of the “the door was fine at first, but now it rubs” complaints that Columbus homeowners report after installation.
Stucco Flashing at Door Frames: The Three-Year Water Test
Stucco exteriors are common on Columbus homes, especially in older Parkway-area neighborhoods. Stucco is a cementitious system that performs well in dry climates and requires disciplined flashing details in wet ones. At a door frame, the critical junction is where the door frame flange meets the stucco face. If flashing is missing or installed in the wrong sequence, water running down the stucco surface finds the gap between flange and stucco and enters behind the frame. The damage shows up in years two and three, not weeks one and two.
The correct sequence is:
- Install a flexible flashing membrane over the rough opening before the door is set. The membrane should extend up the sides of the rough opening and out onto the wall face at the bottom. This is the pan flashing for the sill area, and it directs any water that gets past the frame back out to the exterior.
- Set the door into the opening, then run a continuous bead of polyurethane sealant along the flange where it meets the stucco. This is the primary water barrier.
- Apply a second, overlapping layer of flashing tape or membrane over the top flange, lapping down over the side flanges. This shingles water away from the gap, the same way roof shingles lap downhill.
- Back-seal the interior gap between the frame and the rough opening with low-expansion foam or backer rod and caulk. This is the interior air and water barrier, not the primary one.
- Apply the final exterior caulk joint only after the door has operated through at least one temperature cycle. Caulk applied before the frame settles can crack when the frame moves.
We’ve replaced exterior doors in Columbus where the original installation had no pan flashing and no flange sealant. The stucco looked fine from the outside. Behind the frame, the rough opening studs were softened with moisture, and the threshold screws had rusted through. The water entered slowly, over three Columbus winters, through a gap the width of a putty knife blade.
Understanding Both Warranty Layers on a Prehung Door
A prehung door unit carries two separate warranty layers, and most Columbus homeowners never see the second one because it’s the layer the installer is supposed to handle. Understanding both before installation day tells you what you’re actually covered for and what you’re not.
Layer one: the manufacturer’s component warranty. This covers the slab, the frame components, the hardware, and sometimes the finish. The duration varies by manufacturer and product line. Some manufacturers warranty their slabs for twenty years against warping and delamination. Others warranty the finish for five years, the hardware for one year, and nothing else. The coverage is also conditional: most manufacturers require that the unit be installed level, plumb, square, and properly flashed. If the installation is out of spec, the component warranty is void. That’s the clause that matters. It’s also the clause most often ignored at installation.
Layer two: the installer’s workmanship warranty. This covers the installation labor, not the components. If the door binds because the installer set the jamb out of plumb, that’s a workmanship issue. If the threshold leaks because the installer skipped the sealing sequence, that’s workmanship. The component warranty will not cover either. The workmanship warranty is only as good as the company behind it.
At TruePane Windows & Doors, both warranty layers are registered in writing before the truck leaves the driveway. That means the manufacturer’s component warranty is filed and dated, and our Done Right Promise is documented alongside it. If a door we installed is not done right, we make it right. No paperwork fight, no finger-pointing between manufacturer and installer. The homeowner knows exactly which layer covers what, in writing, on installation day. We mention this because we’ve repaired too many Columbus doors where no warranty was ever registered, and the installer was unreachable by the time the door started failing.
Choosing the Right Door Unit for a Columbus Climate
Columbus gets all four seasons with meaningful temperature swings and precipitation. A door unit that performs in a mild coastal climate may not hold up here. The material choice matters more than most guides admit.
- Fiberglass doors hold up best in Columbus. They don’t warp with humidity swings, they take paint well, and the better ones carry insulated cores with R-values that matter when the temperature drops below freezing. Brands like PGT produce fiberglass door systems designed for thermal performance.
- Steel doors are structurally stable but dent, and once the paint or factory finish is compromised, they rust. In a Columbus climate with freeze-thaw cycles and de-icing salts tracked onto the threshold, steel requires vigilant maintenance.
- Wood doors are beautiful and generally the worst choice for Columbus humidity swings. They expand in summer, contract in winter, and eventually split or warp. If you choose wood, plan for annual refinishing and accept that the threshold clearance will change seasonally.
- Composite or engineered wood cores split the difference. They’re more stable than solid wood and more dent-resistant than steel, though generally pricier than either.
The threshold material matters too. Aluminum thresholds conduct cold directly into the house. Composite thresholds with a thermal break perform better. On a slab foundation in a Columbus winter, an unbroken aluminum threshold becomes a heat sink pulling warmth out of the floor finish. We quote manufacturer lines side by side on paper so Columbus homeowners can see exactly what they’re buying. A Simonton or Ply Gem unit carries different specifications than a PGT or CGI unit, and the differences show up in the performance numbers, not the brochure language.
The Installation Sequence That Prevents Callbacks
The order of operations in a door installation is not arbitrary. It’s a sequence, and each step depends on the one before it. Here’s the full sequence we follow on every Columbus door installation:
- Verify the rough opening. Width, height, squareness, header bearing, and rough opening depth. Correct any structural issues before ordering.
- Dry-fit the door unit. Set the prehung unit into the opening without fasteners. Check that the slab clears the rough opening edges and that the threshold will sit on the prepared sill surface.
- Flash the rough opening. Install pan flashing at the sill, then flexible flashing membrane up the jambs and over the head. This is the water management layer that protects the rough opening from any water that gets past the exterior trim.
- Set the door and shim the hinge side. Place shims behind each hinge plate. Set the hinge-side jamb plumb first, using a 4-foot level. Fasten at the hinge locations only, not along the full jamb length.
- Shim the latch side. Set the gap between slab and jamb at a consistent width, typically 1/8 inch. Fasten the latch-side jamb at the strike plate location and behind the lower corner.
- Shim the head. Fill the gap between door head and rough opening header with shims, leaving the manufacturer-specified clearance. Fasten the head jamb.
- Check operation. Open and close the door. It should swing freely without dragging and latch without force. Re-check hinge-side plumb after the slab is hung.
- Seal the threshold. Run the polyurethane sealing sequence described above. On slab foundations, this step is not optional.
- Insulate and seal the perimeter. Low-expansion foam or backer rod and caulk around the full perimeter, inside and out. Keep foam expansion pressure off the jamb faces.
- Install exterior trim and flashing. Flashing tape over the top trim, lapping down over the sides. Caulk the trim perimeter with polyurethane.
- Install interior casing. Keep casing nails out of the shimmed areas behind the jamb. Casing is decorative; it should not be used to hold the jamb in position.
- Register both warranty layers. Manufacturer component warranty and installer workmanship warranty, in writing, before the job is signed off.
We complete most Columbus door installations in a single visit. The sequence takes four to six hours for a standard prehung exterior door, longer if the rough opening needs correction or the old frame has concealed damage. We never leave a second appointment hanging, and the bill matches the quoted price. That’s the square deal: no surprise line items after the work is done.
Common Mistakes to Avoid
- Ordering before checking the rough opening. A premium door installed into an undersized header or out-of-square opening will fail regardless of installation quality. The opening is the foundation; the door is only as good as the hole it sits in.
- Using latex caulk instead of polyurethane at the threshold. Latex caulk cracks and releases within a few Columbus freeze-thaw cycles. Polyurethane remains flexible and adheres to concrete, aluminum, and composite.
- Skipping the pan flashing on a slab foundation. Concrete slabs move moisture upward. Without a pan flashing under the threshold, that moisture has a direct path into the rough opening and the bottom of the frame.
- Setting the latch side plumb without checking the hinge side. The hinge side is the primary reference. If the hinge-side jamb is out of plumb, the door will swing wrong no matter how perfect the latch side looks.
- Driving casing nails into shimmed areas. Casing nails driven through the shim pockets can shift the jamb after the slab is hung. Casing should be attached to the wall, not used to adjust the frame.
- Accepting a verbal warranty promise. A warranty that is not registered in writing does not exist. Both warranty layers must be documented with durations stated, or the homeowner has no coverage when something fails.
- Replacing a door into a deflecting opening. If the header has already sagged, a new door will bind the same way the old one did. The structure needs correction before the door goes in.
When to Call a Professional
You should call a professional for any exterior door installation where the rough opening shows signs of structural movement, where the floor above sags, or where the existing frame shows water damage. These conditions require correcting the opening before the new unit goes in, and that work is beyond what most homeowners should attempt themselves. You should also call a professional if the home has a stucco exterior and the existing flashing is missing or compromised. Getting stucco flashing wrong causes hidden damage that takes years to surface. TruePane Windows & Doors offers free estimates in Columbus, and we’ll evaluate the rough opening, the header, and the existing flashing before recommending anything. Call (888) 635-0804. A live person answers the phone.
Frequently Asked Questions
Door installation in Columbus typically ranges from $450 to $1,800 for labor alone, depending on the door type, opening condition, and whether the existing frame is being replaced or reused. The full project including a mid-grade prehung exterior door, removal of the old unit, and installation of new trim and hardware generally lands between $1,200 and $3,200 in our experience. Fiberglass doors run higher than steel, and anything with custom sizing or sidelights pushes the price upward from there. Call (888) 635-0804 for an exact quote. Estimates are free.
A standard exterior door installation takes four to six hours when the rough opening is in good condition. If the opening needs structural correction, flashing replacement, or stucco repair, the job may take a full day or longer. Most TruePane Columbus door installations are completed in a single visit. We’ll tell you before we start whether the opening needs work, and the price we quote is the price you pay.
A prehung door includes the slab, frame, hinges, and threshold assembled as a unit. It does not include the interior or exterior trim, the lockset, the deadbolt, or the weatherstripping at the perimeter, which are typically purchased separately or added on. Both warranty layers on the prehung unit, the manufacturer’s component coverage and the installer’s workmanship coverage, should be registered in writing before installation is signed off. Call (888) 635-0804 if you want us to walk you through what a specific unit includes.
You can install an exterior door yourself if the rough opening is square, plumb, and structurally sound, and if the home has a wood subfloor rather than a slab. The work requires a 4-foot level, shims, polyurethane sealant, flashing materials, and the willingness to spend four to eight hours getting it right. If the opening needs correction or the home sits on a slab foundation with a stucco exterior, a professional installation is the better call. The cost of a door replacement is small compared to the cost of repairing a threshold leak that’s been running for three years.
Doors in Columbus homes stick in the summer because humidity causes wood and composite materials to expand, reducing the clearance between slab and frame. If the door was installed with tight clearances, the summer expansion causes binding at the latch or drag across the threshold. The fix is typically to adjust the gap spacing or re-shim the jamb, not to plane the slab. We’ve fixed many Columbus doors that were installed with insufficient clearance for local humidity swings.
Permit requirements for door installation in Columbus depend on the scope of work and the municipality. Replacing a door in the same opening with a same-size unit generally does not require a permit. Changing the opening size, adding an exterior door where one did not exist, or modifying the header typically does. We evaluate the permit requirement on every job and pull permits where they’re needed. It’s part of doing the work right rather than hoping the inspector never shows up. Call (888) 635-0804 and we’ll tell you whether your project needs a permit.
The Bottom Line
A door installation in Columbus is only as good as the opening it sits in and the sealing sequence that keeps water out. Check the header for adequate bearing before ordering a unit. Set the hinge-side jamb plumb and verify it holds after the slab is hung. Run a two-bead polyurethane seal under the threshold on any slab foundation. Flash stucco properly at the frame, because the damage from skipped flashing takes three years to show and costs far more than the flashing would have. And get both warranty layers in writing, with durations stated, before you sign off on the job. That’s the difference between a door that operates cleanly for twenty years and one that binds in July and leaks in March. If you’re in Columbus and want a professional evaluation before you buy, call (888) 635-0804 for a free estimate. We’ve been doing this work since 2008, and TruePane Windows & Doors home still stands behind every installation. We’ll be there when we say, and if the pane is not true, the job is not done.
Written by Dale Kessler, Owner at TruePane Windows & Doors, serving Columbus since 2008. Explore more guides & resources from our team.